Final grade calculations for COMP110 include some conditional logic, including:
If you miss a quiz due to absence, or take all four quizzes and have a low score below your final exam score, then your final exam weight will take the place of one quiz’s weight.
To pass COMP110, you must take at least three quizzes, score a 40% or greater on the final exam, and have a passing grade in the course.
Additionally, the final grade letter is determined by logic around ranges of values, such as a 93 or better being an A, and rules around fractional grades rounding up or down.
In this exercise, you will be guided through breaking down the problem of calculating your final grade in a Python program. There are many, many ways this program could be written, so we will provide some high-level structure to help guide the process and practice breaking down problems into smaller, simpler functions.
In this exercise, you will gain practice with the following concepts:
- Composing larger programs from small functions
- Using tuples to store many values (LS grades, EX grades, etc)
- Using built-in functions,
min,sumwith tuples - Using named constants to put names to “magic numbers”
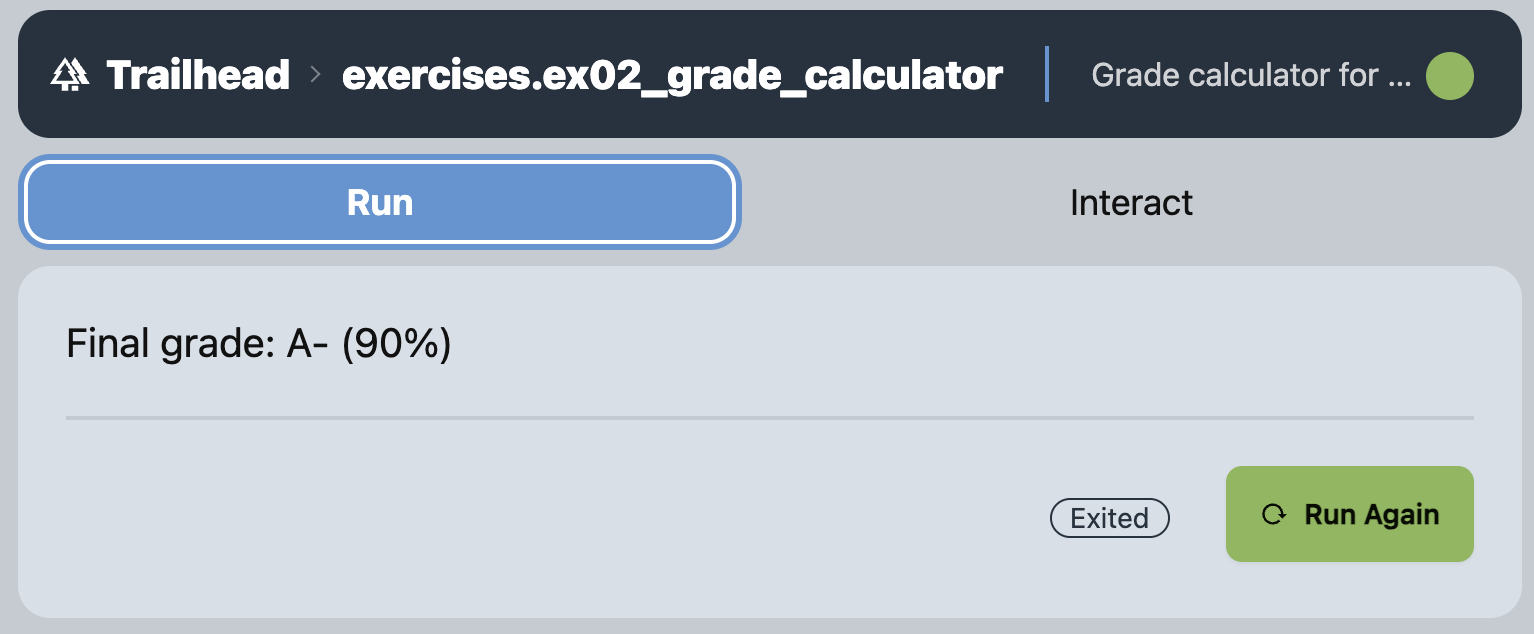
Ultimately, you will produce a program that generates a final grade calculation:
Please know that in this exercise you will need to limit yourself to making use of only the concepts we have covered in lecture. The autograder has some checks in place to penalize the usage of concepts we have not yet covered. Limiting yourself to only what we have covered is good practice. Anything we have discussed in lecture is permitted. If you show up in office hours with code beyond the scope of what we have covered in class, we will ask to remove it and start from what has been covered.
Part 0. Getting Started
Start your COMP110 DevContainer by first being sure Docker Desktop is running, then opening VS Code, then using the File > Open Recent menu to select the “COMP110 Workspace” folder that has [Dev Container] following its the name. This will open a new VS Code window with the DevContainer running. Finally, go to the “Run and Debug” view to press the play button to begin Trailhead. Open Trailhead in a web browser tab and arrange your windows side-by-side. These are the steps we will generally get in the habit of following as work begins on a project.
In the exercises directory of your project workspace, create a new Python program file named ex02_grade_calculator.py.
As with all exercises, you will need to add a Docstring and __author__ attribution line to the top of your exercise file. Go ahead and add a Docstring for this program. Your Docstring should state the goal of this program, based on the overview above, in one sentence in your own words. Once you save this, you should be able to navigate to the exercises directory in Trailhead, see ex02_grade_calculator listed, and see the Docstring you added.
Add two blank lines below the Docstring, then add the __author__: str = "123456789" line, substituting your UNC PID for the 123456789 value.
Part 1. Establishing Input Grade Data
As discussed in class, a tuple value provides the ability to store a sequence of values. We will use a tuple for each of the grade components in this course, exercise scores, reading scores, lesson scores, and so on. In order to simplify our program, rather than representing scores as point values, we will represent scores as float percentages where 1.0 is 100% credit.
New Concept: Type Alias - because a type such as tuple[float, ...] is both long to type and ambiguous as to meaning of the values in the tuple (e.g. it could be a tuple of temperatures, or a player’s time in a game, or bank account balances), it is common to alias a data type. A type alias simply provides an alternate name for the data type that is more meaningful for humans reading and writing the program. Go ahead and establish a type alias named Scores (with a capital S) that is equivalent to a tuple[float, ...] as shown in the following snippet:
Scores = tuple[float, ...]
"""Scores is a tuple of floats representing percent credit from 0.0 to 1.0."""
After this type alias is established in the global frame, it can be used throughout the rest of our module. Notice the Docstring for a type alias follows its declaration. It is additionally worth noting “user” (you are the user here!) defined types, such as Scores, conventionally begin with capital letters to distinguish themselves from built-in types (such as int and bool) and parameter names.
Next, we need to score data to compute a grade with! Later in the course we will learn how to read data into our programs from files, but for now we will “hard code” some data into our program. This has the upside of simplicity, but the downside that to compute new grades you will need to update the data in this program as the course continues.
New Concept: Named Constants - To prevent a program from having lots of “magical numbers” floating around, which are literal values without names associated with them, we can establish Named Constants to reference the values by a meaningful name. This concept is related to a type alias, but subtly different: a type alias gives a type another name, a named constant gives a value a name. Named constants are given name identifiers that are ALL_CAPS_LETTERS with words separated by underscores. This convention is true across many programming languages and helps visually differentiate them from types, parameters, function names, and so on.
Let’s define a global named constant for exercise scores, whose type is Scores (remember: this is only an alias for float[tuple, ...]!) and is assigned a tuple literal:
EX: Scores = (83.0 / 100.0, 105.0 / 100.0)
"""Exercise scores"""
You should replace the EX tuple item’s values with your exercise scores to be more meaningful. Notice, here, each item is specified as an expression which is points earned over points possible. If you wanted to go ahead and simplify your expression values, you could have written the tuple as (0.83, 1.05), instead. The item values of a tuple literal are themselves expressions, so as long as each value evaluates to the correct .
In Trailhead, you can go to the “Interact” REPL and see that these expressions are simplified to singular values at runtime:

Go ahead and establish global, named constants for RD (readings), LS (lessons), and CL (class/lecture) Scores and enter your grades with two warnings:
- For a component where there are no scores yet, such as readings, you can express an empty tuple literal as
() - To write a single-item tuple literal a trailing comma is required, to differentiate it from normal parentheses, for example:
(1.0,)
We will worry about quiz and final exam scores later. For now, let’s focus on calculating the preparation, practice, and participation component of the final grade.
Part 2. Calculating the average of a Component
Define a function named average with a parameter of type Scores, whose name is yours to choose but should be meaningful, and returns a float.
This function has two important cases to care about and requires a conditional if-else statement to successfully implement. When the Scores parameter is not empty, it should return the average of the parameter’s values. Remember, you can use the built-in sum and len functions to compute the average of Scores! The second case to concern yourself with: what happens when the Scores parameter is empty? Division by zero is an important “edge case” that will crash a program. In this edge case, which is opposite the expected case of a non-empty tuple, return 0.0 instead. Use an if-else statement to implement this logic.
Once implemented, you should test out average function calls in the REPL and use the named constants established in Part 1 as arguments to test your implementation.
As with all functions, you should add a Docstring that describes the purpose of the function definition.
Part 3. Calculating the ppp_components Total
In the syllabus, 40% of the final course grade is driven by “Preparation, Practice, and Participation” which we are abbreviating ppp here. These are the EX, RD, LS, and CL grades combined, each with its respective weight.
Define a function named ppp_components, that defines four parameters: ex, rd, ls, and cl all of type Scores. This function should return a float value which will ultimately range between 0.0 and just above 0.4 (thanks to up to 5% extra credit for early exercise hand-in) and represent the total PPP weight earned.
Inside the function definition, define four local named constants. We call these “local” because they are “local” to a function definition and only resolvable using name resolution from within the current frame and not the globals frame. Name these constants: EX_WEIGHT, RD_WEIGHT, LS_WEIGHT, and CL_WEIGHT with values corresponding to their percentage weights defined in the syllabus (remember 25% is represented as 0.25 as a float).
This function should calculate the average of each parameter grade component (using the function you wrote in Part 2), scale (multiply) this average by the component’s weight (defined in the constants aboved) and add them up. Written as a mathematical expression:
(exavg × EX_WEIGHT) + (rdavg × RD_WEIGHT) + (lsavg × LS_WEIGHT) + (clavg × CL_WEIGHT)
You should try calling your defined function in the REPL and confirming the value returned is as expected:

For grade projection purposes, you can go ahead and give yourself an RD grade of 1.0 so that your reading component does not project 0% credit.
Part 4. Calculating the quiz_average
This function calculates a quiz average with the final exam replacing the lowest quiz score, if it improves the quiz average.
Technically, there are four quizzes in our section of COMP110, but this function should work with any number of quizzes. (In a later function we will check to be sure at least 3 of 4 quizzes were taken.)
In the part of your program where you have global named constants declared for EX, RD, and so on, go ahead and declare two more globally named constants: (1) QZ of type Scores with a tuple of float percentages for quiz scores and (2) FN of type float (not a tuple!) with your hopeful, projected final exam score out of 1.0.
Delare a function named quiz_average with two parameters: a parameter of type Scores for quiz scores and a parameter of type float for the final exam score. The function will return a float. Add a Docstring which describes the function’s purpose.
In the event no quiz Scores are in the tuple parameter, quiz_average should result in the final exam score parameter. Otherwise, return the greater of the quiz average or the average of quiz scores when the final exam replaces the low quiz score. This description is intentionally vague and you should think about how to most logically and simply approach this logical decision. Hint: the min function will tell you the lowest value in a sequence, such as a tuple of float values.
Part 5. Calculating the mastery_components Total
In COMP110, mastery demonstrated on quizzes and the final exam accounts for 60% of your final course grade. This function calculates the total weight of the two mastery components.
Define a function named mastery_components with a parameter of type Scores for quiz scores and a parameter of type float for the final exam score. Like with ppp_components, you should define local named constants for the weights of quizzes and the final exam.
Using the quiz_average function you wrote previously, which handles the logic for replacing a low quiz score with the final exam score, compute the total mastery score in this function. When testing, you can expect to see values in the range of 0.0 to 0.6 being returned by this function.
Part 6. Counting Zeros in Quiz Scores with count_zeros
We will ultimately need to be sure at least 3 of 4 quizzes were taken. When a quiz is not taken, it will be listed as a 0.0 in the QZ Scores tuple. The function count_zeros will be implemented as a recursive algorithm similar to those traced in lecture, with a simple twist.
Define a function named count_zeros with the following parameters:
- Name
qz, typeScores- this represents a tuple of floats of quiz scores - Name
count, typeint- this is the number of zeros counted thus far in the algorithm - Name
i, typeint- this is the current quiz index
The function should return a data type appropriate for counting a whole number of values.
New concept: default parameter values. Sometimes it is useful to define functions whose parameters have default values assigned to them. These default values are used only when a function call does not provide a value for the parameter. In the context of this function, count and i should ideally both default to 0 because the count algorithm will start with having seen 0 zeros and focused on index 0. Thus, we would like to define count_zeros such that these two calls are equivalent to one another:
count_zeros(qz=QZ, count=0, i=0)Should be equivalent to:
count_zeros(qz=QZ)To do so, you can utilize default parameters with the following syntax. Update your function signature for count_zeros to:
def count_zeros(qz: Scores, count: int = 0, i: int = 0) -> int:As we are still growing comfortable writing recursive algorithms, we will give you an English-like, “pseudo-code” description of the logic your function is expected to implement.
- If
iis greater than or equal to the number of quiz scores, return thecountparameter - Otherwise:
- If the quiz at index
i(e.g.qz[i]) is equal to0.0, then return the result of recursively callingcount_zeroswith the same quiz tuple, thecountargument increasing by1and theiargument increasing by1. Conceptually, this is saying “add one to thecounttally and continue the counting algorithm with the nextiindex”. - Otherwise, return the result of recursively calling
count_zeroswith the same quiz tuple, the samecountargument value (because we did not count a zero!), and theiargument increasing by1. Conceptually, this is saying “keep counting without changing thecounttally, but move on to the next index”.
- If the quiz at index
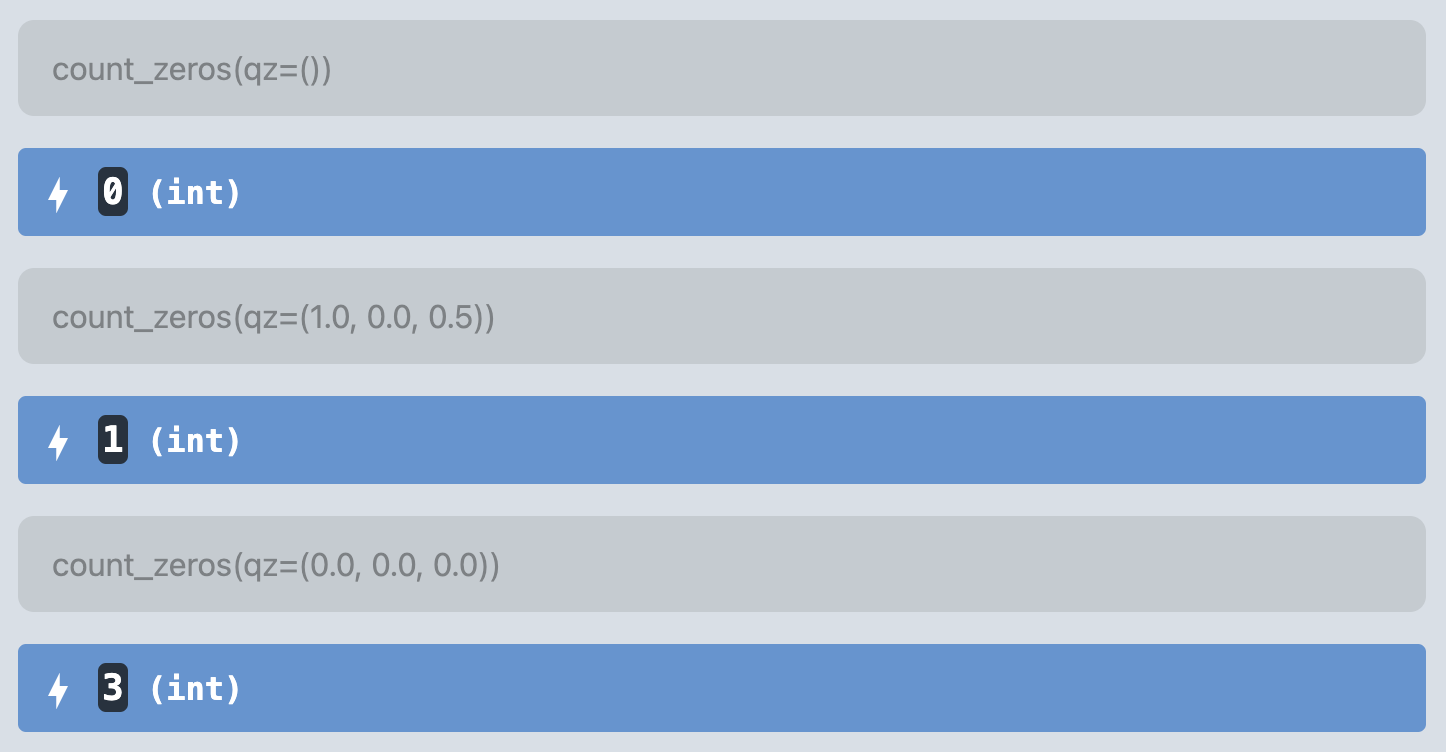
Test your implementation in the REPL. You should try other variations of values, but at least the following sample tests should return the expected count of zeros:
Part 7. The has_min_mastery Function
The next function you will define is has_min_mastery which will be used to check if a student has met the minimum mastery requirements to pass the course. This function will be used to determine if at least 3 quizzes were taken and the final exam score is at least 40%.
Define a function named has_min_mastery with the following parameters:
- Name
qz, typeScores- this represents a tuple of floats of quiz scores - Name
fn, typefloat- this represents the final exam score
This function should return a bool value.
The function should return True if there are at least 4 items in the qz parameter and the number of zeros quiz scores is no more than 1 and the final exam score is at least 40%. Otherwise, the function should return False. You should make use of the count_zeros function you wrote in Part 6 to implement this function.
For full credit, this function should not use an if-then-else statement and should instead return a compound boolean expression. This is a good opportunity to practice using the and operator to combine multiple boolean expressions into a single result.
Part 8. The letter_grade Function
The only remaining helper function needed is to convert a numerical grade into a letter grade.
Define a function named letter_grade with the following parameters:
- Name:
total, typefloat- this represents the final grade, all grade components added together with their weights, as a percentage where 1.0 is 100% - Name:
has_min_mastery, type:bool- this represents whether the student has met the minimum mastery requirements to pass the course
This function should return a string value, representing the letter grade for the course, from A through F. You can find the grading scale breakdown here. Pay close attention to the rounding cut-offs for each letter grade: 0.5% to 0.9999…% rounds up.
If has_min_mastery is not True, then the function should automatically return an "F". Otherwise, the function should return the correct letter grade as specified in the syllabus.
Part 9. The calculate_grade Function
Finally, to bring your program together, define a function named calculate_grade. This function’s signature will look like:
def calculate_grade(ex: Scores, rd: Scores, ls: Scores, cl: Scores, qz: Scores, fn: float) -> str:The purpose of this function is to produce a final grade calculation by making use of many of the helper functions you wrote above, including ppp_components, mastery_components, has_min_mastery, and letter_grade. Ultimately, the total final grade score is computed by adding ppp_components to mastery_components. The has_min_mastery function is needed to check for satisfying the minimum requirements to pass. Finally, the letter_grade function produces the final letter grade. You are encouraged to use local named constants to store the results of these function calls since they are used in multiple places in the function. Finally, this function should return a string in the format:
"Final Grade: A (96%)"You should use a format-string to produce the returned string. Additionally, you should use the round function, with some arithmetic, to round the final grade to the nearest whole number percentage.
Part 10. Making the program runnable
Add the following idiomatic python code to the bottom of your program to make it runnable:
if __name__ == "__main__":
    print(calculate_grade(ex=EX, rd=RD, ls=LS, cl=CL, qz=QZ, fn=FN))
After adding this to the end of your program, you should now be able to use the “Run” tab to see the final output. Wow, lots of code to compute a single string! As the semester continues on, you are encouraged to update the EX, RD, LS, CL, QZ, and FN named constants to reflect your actual grades as the course progresses. For the QZ and FN named constants, you can project your hopeful scores to see how it will affect your final grade.
Submitting Your Work to Gradescope
Now is a good time to submit your work to the autograder!
In VSCode, open a new integrated Terminal with `Ctrl+Shift+``, or going to the Terminal menu and selecting “New Terminal.” We will learn more about what the terminal is and gain experience with “command line interfaces” later in the course. For now, enter the following command into the terminal and press enter:
python -m tools.submission exercises/ex02_grade_calculator.pyYou will notice a file appeared in your workspace named 24.02.dd-hh.mm.ss-ex02_grade_calculator.py.zip. You will see numbers for the current day of the month in place of dd, 24-hour digits in place of hh, minutes in place of mm, and so on. This “zip” file contains your work and is what you will submit to the autograder.
In Gradescope, open assignment “EX02 - Grade Calculator”. You should see an area to upload a zip file. Click this area and browse to your course’s workspace directory on your computer. You should see the zip file you just created. Select it and upload it to Gradescope. Autograding should complete within about a minute and you should see a score of 100%, or more if you are submitting early. If you see less than 100%, try to understand the feedback and the points that were taken off and resubmit. If you are still having trouble, please come see us in office hours!
Make a Backup Checkpoint “Commit”
Now that your first program is complete, let’s practice making a backup. Visual Studio Code has built-in support for git source control management (SCM). SCM tools are made to help create versioned checkpoints of a project’s source code (your program is source code!) among other uses. The current de facto SCM is called git. As one more piece of terminology, a checkpointed version in git is called a commit. Once your work is in a commit checkpoint, you can always return back to your project at that point in time without the risk of losing work. We encourage committing work to backup at least each time you submit a project for grading or are finishing out a working session for the day. Commits are free to make and can only help you avoid losing work; use them liberally!
- Open the Source Control panel (Command Palette: “Show SCM” or click the icon with three circles and lines on the activity panel).
- Notice the files listed under Changes. These are files you’ve made modifications to since your last backup.
- Move your mouse’s cursor over the word Changes and notice the + symbol that appears. Click that plus symbol to add all changes to the next backup. You will now see the files listed under “Staged Changes”.
- If you do not want to backup all changed files, you can select them individually. For this course you’re encouraged to back everything up.
- In the Message box, give a brief description of what you’ve changed and are backing up. This will help you find a specific backup (called a “commit”) if needed. In this case a message such as, “Finished Exercise 02!” will suffice.
- Press the Commit button to make a Commit (a version) of your work.
- In the Terminal, type the command
git push backup main. If your terminal was closed, go to the Terminal menu and select “New Terminal”. This command “pushed” your changes to your backup repository on GitHub.
To see your commit on Github, in a web browser, navigate to https://github.com/comp110-24s-003/comp110-24s-workspace-USERNAME and substitute USERNAME with your GitHub username. You should see your work in exercises/ex02_grade_calculator.py backed up to GitHub. Notice above the file’s contents you’ll see your commit message.