In this problem set you will learn how digital image filters work by implementing a few classics, like border, brightness, and saturation, yourself! These same techniques are used in apps like Instagram and Snapchat to change the overall look of an image.
Browser Compatibility Warning: This problem set recommends working in the Chrome web browser or Safari. Using Edge or Firefox may result in a buggy experience, if it even works at all.
0. Introduction
Digital Colors are traditionally represented with 3 components: red, green, and blue. If you were to hold a magnifying glass up to your laptop’s screen, you would likely see each dot, or “pixel,” is actually 3 smaller dots whose colors are red, green, and blue.
By varying the intensity of these red, green, and blue dots, from 0 to 255, your display can output the entire range of colors you see on your screen. All three components at 0 is black, all three at 127 is the mid-range gray, all three at 255 is white. Carolina Blue, for example, is red 75, green 156, blue 211.
In our code, we will represent each component with an int value between 0 and 255.
Digital Images, then, are 2D lists of Color values. We will call such an image a Bitmap. The size of the Bitmap’s 2D list depends on the quality of the picture. A modern smart phone, like the one in your pocket, captures pictures with anywhere between 4 to 16 million color dots, called pixels. The Bitmap class in this exercise lets us store and manipulate hundreds of thousands of Color elements in a 2D list!
Digital photo Filters are algorithms that receive an input Bitmap, process each Color “pixel” in it element-by-element, and return an output Bitmap that has been processed.
In this assignment you will implement a few Filter classes, each with one specific purpose that can be applied in a varying amount. For example, a BorderFilter’s goal is to draw a colored border around the Bitmap and the border’s thickness is a variable amount. Another example is a BrightnessFilter whose goal is to brighten or darken an image by some amount.
1. Setup
A new release of Trailhead is needed for this exercise. In your VSCode DevContainer, open up the .devcontainer directory, find the devcontainer.json file, and look for the line "image": "krisjordan/trailhead:...". Update this line to version 0.2.0:
"image": "krisjordan/trailhead:0.2.0",Save the file and you should be prompted to rebuild your container. Accept this prompt and the new version will be installed in a minute or two.
Because this assignment will carry out a lot of processing, we will start trailhead via the VSCode Terminal rather than via the Run and Debug pane. To do so: click the View menu and select Terminal. From here, type trailhead and press enter. Trailhead will begin in a faster mode without debugging. If your project feels very slow, be sure you are running Trailhead in this way.
Create a new directory in exercises named ex07_compstagram.
We are providing two supporting files that you will copy and paste into VSCode:
Add a file to
ex07_compstagramnamedsupport.py- this file contains support code that you will not need to modify, but should read through. You can find the contents of this file to copy here: https://raw.githubusercontent.com/comp110-24s-003/comp110-24s-workspace/main/starter/ex07/support.pyAdd another file to
ex07_compstagramnamedcompstagram.py- this is the file your work will be completed in. We provide a sampleInvertFilterfor your perusal. Find the contents of this file to copy here: https://raw.githubusercontent.com/comp110-24s-003/comp110-24s-workspace/main/starter/ex07/compstagram.py
2. Understanding the Support Code in support.py
Let’s start with support.py. You should not need to make any changes to this supporting code, but you will need to understand a few key classes defined in it.
The Color class represents a single, digital color made up of three component colors (attributes) which are: red, green, and blue. Your filters will manipulate Color objects, so you should read and familiarize yourself with the Color class in support.py.
The Bitmap class represents a digital image via a 2D “list of lists” of Color “pixels.” Its 2D list is organized in a row-major order, meaning the outer list’s index represents the “rows” of the image and the inner lists’ indices represent the “columns” of the image. Your filters will each apply an algorithm to every pixel in the array. You should read and familiarize yourself with the Bitmap class.
The Filter Protocol declares the method signatures each Filter needs in order to be considered Filter. An image filter is an algorithm that processes a Bitmap and modifies it in some way. For example, in any mobile phone image editing software you’re likely to encounter brightness, saturation, border, and other image filters. You should read and familiarize yourself with the Filter protocol in support.py.
The only other class to concern yourself with is the Request class. Instances of this class will be given to your code in compstagram.py when the user takes action in the frontend. You will notice it is made of a Bitmap (image) and list of Filter object implementations. This captures a user’s request to apply one, or more, filters to an image.
The other class and functions in this file are a bit beyond your concerns in COMP110, but if you are curious feel free to read through.
3. Getting Started with compstagram.py
Go ahead and replace the __author__ variable with your 9-digit PID.
In this assignment, you will implement filters that manipulate Bitmap and Color data. The graphical user interface (GUI) for interacting with your filters is provided in support code. From it you can:
Load a different image than the default Old Well image.
Select the filter(s) you are applying to the image.
Manipulate the amount the filter is applied from 0.0 to 1.0. This value will be given to your Filter. This will send a
Requestto themainfunction incompstagram.pywhich will in turn apply the filters to the image.Save your Image after your Filter(s) have been applied to share proudly on Instagram (please tag
@therealkrisjordanif you do!)
3.1 Invert Filter (Freebie)
If you run the app you’ll notice only the InvertFilter is enabled. This is intentional! Try pressing the add button to add the InvertFilter to the app and click the amount slider around with your mouse.
The class InvertFilter is given to you in its entirety with narrative code comments. This is meant to serve as an example for how a Filter class is structured and how a processing algorithm is implemented. You should read the source code of InvertFilter for understanding and tinker around with its amount slider in the GUI before writing your own.
3.2 BorderFilter
The first Filter for you to implement is BorderFilter. To get started, in compstagram.py, find the TODO comment in the get_filter_types function. Delete it and uncomment the line that constructs the FilterSettings object for BorderFilter. Save your file and you should see “BorderFilter” show up in the GUI’s Filter drop-down now. The front-end GUI calls this function to know which Filters are available to select and what their default amount is. When you add additional filters, you’ll add their settings here, as well. You’ll notice no border is added and if you try changing the “Amount” slider, nothing happens! Your work begins…
Scrolling down in compstagram.py around line 120, you’ll find the BorderFilter class defined with . The goal of BorderFilter is to add a border around your input Bitmap whose
borderthickness
is controlled using the amount attribute. The user interface’s amount slider will set this value between 0.0 (no border) and 1.0 (entirely border). Here are some examples:
| Amount | / Example |
|---|---|
| 0.0 |  |
| 0.25 |  |
| 0.5 |  |
| 0.75 | 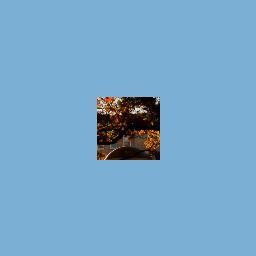 |
| 1.0 |  |
You’ll use the following formula for calculating the border’s width:
borderthickness = imagewidth/2 * filteramount
You’ll want to define a local variable within the method to hold
borderthickness
. Its type will need to be an int, because the thickness refers to indices in the 2D array of pixels. You will need to use the int constructor to floor, or round down, your thickness expression above.
Spend a minute to reason through why you’re using this formula. Why are you dividing the image’s width in 2? What is the impact of multiplying half of the width by a value between 0.0 and 1.0?
In the same way that InvertFilter’s process method works, you’ll need to write one, or more, loops to iterate over the correct pixels to fill in with the color attribute. Then you’ll need to return the modified Bitmap.
Now that you know the border’s thickness, how will you know whether any individual pixel is a part of the border or not? Using the row and column of a pixel, if any of the following four inequalities are true, you’ll know you are in a border area:
| Side | Inequality |
|---|---|
| Left | col < borderthickness |
| Right | col > = imagewidth − borderthickness |
| Top | row < borderthickness |
| Bottom | row > = imageheight − borderthickness |
If you are in a border area, the Color you will set each border pixel to is stored in this BorderFilter’s attribute named color. You’ll assign this to the bitmap pixel at row/column, instead.
It’s a good idea to start with trying to draw one of your border sides first and then add the others one-by-one.
3.3 Brightness Filter
Let’s make it possible to add lightness or darkness to your Bitmaps!
Now that you’ve been around the block with the BorderFilter, you’ll take on modifying pixels by their red, green, and blue component values. At the bottom of compstagram.py, where a related comment appears, define your BrightnessFilter. Be sure it conforms to the Filter protocol in support.py. It will take a similar shape to BorderFilter, but without a color attribute. Again, you’re tasked with implementing the process method’s algorithm.
For the BrightnessFilter to show up in the filter select menu in the GUI, go to the get_filter_types function and add a new entry to the returned list that constructs a FilterSettings object with name "BrightnessFilter" and amount 0.5. After saving the file BrightnessFilter should now be a filter you can select in the GUI. Notice that the order of filters in the GUI is the same as defined in get_filter_types. Feel free to rearrange these FilterSettings so that the one you are working on is at the top of the list and initially selected without extra clicking.
For BrightnessFilter, and the filters that follow, we will not walk through the steps to process it via for loops and return the processed image. Refer to those steps from BorderFilter or InvertFilter.
With BrightnessFilter, you want an amount of 0.5 to result in no change in brightness to your image, 0.0 to be 100% darker than the input, and 1.0 to be 100% lighter than input. Remember, as each red/green/blue component of a Color decreases toward 0.0 it becomes darker. As each increases toward 1.0 it becomes lighter.
| Amount | / Example |
|---|---|
| 0.0 |  |
| 0.25 |  |
| 0.5 |  |
| 0.75 | 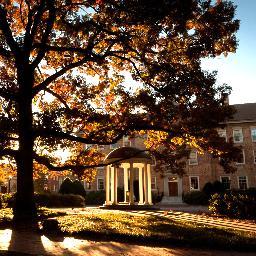 |
| 1.0 | 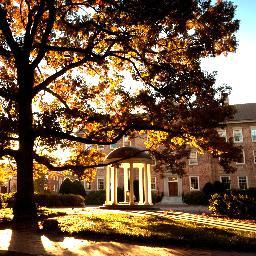 |
As such, here is a formula for calculating our brightness factor.
factorbrightness = (filteramount − 0.5) * 2.0
Take a minute to think about what your brightness factor will be if your filter’s amount is any of 0.0, 0.5, and 1.0. Essentially, you’re “translating” amount to between -0.5 and 0.5 and then “scaling” it by 2.0 so that your possible factor domain is between -1.0 and 1.0.
Now that you have that stored in a local variable, you need to manipulate each of pixel’s three components (the red, green, and blue properties) with the following formula:
outputcomponent = inputcomponent + (factorbrightness * inputcomponent)
To modify each pixel’s components, you’ll first need to access the Color pixel from your bitmaps’s pixels array, then manipulate each of its component values. For an example of working with components like this, refer to InvertFilter’s process method.
3.4 Saturation Filter
At the bottom of compstagram.py, where a related comment appears, define your SaturationFilter. Be sure it conforms to the Filter protocol in support.py. It will take a similar shape to BrightnessFilter, but without a color attribute. Again, you’re tasked with implementing the process method’s algorithm.
For the SaturationFilter to show up in the filter select menu in the GUI, once again go to the get_filter_types function and add a new entry to the returned list that constructs a FilterSettings object with name "SaturationFilter" and amount 0.0. After saving the file SaturationFilter should now be a filter you can select in the GUI.
You can think of Saturation as the intensity of non-gray Colors in an Image. A completely desaturated Image can be thought of as a grayscale or “black and white” Image. “Black and white” photos are actually many shades of gray. An interesting property of pure black, grays, and white is that each of their three component values are exactly the same. White is (255, 255, 255), grays vary from (254, 254, 254) to (127, 127, 127) to (1, 1, 1) and black is (0, 0, 0). Grayscale implies the red, green, and blue components of each Color are equal to one another.
How can you convert any Color to be grayscale? Spend a minute to think about this.
| Amount | / Example |
|---|---|
| 0.0 | 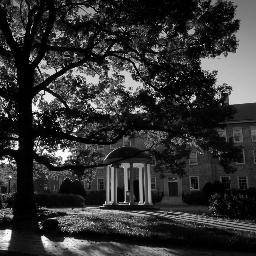 |
| 0.25 | 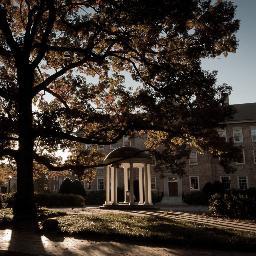 |
| 0.5 |  |
| 0.75 | 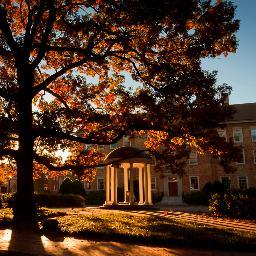 |
| 1.0 |  |
It turns out there are many ways to convert a non-gray Color to grayscale. (You can read a lot on the internet about it!) For this assignment, you’ll use a simple hack: take the average of each component and use that (don’t forget to convert back to an integer!).
componentaverage = (componentred + componentgreen + componentblue)/3
You’ll construct a new Color using that average value for each of its red, green, and blue components. This will be your target grayscale Color.
Each pixel you process, then, has a different target Color.
In BrightnessFilter, you did some arithmetic with amount to come up with a factor whose domain is between -1.0 and 1.0. With SaturationFilter you’ll do something similar except flip the signs by subtracting from 0.5. The rationale for this is as you decrease saturation you want to move closer to your grayscale average.
factorsaturation = (0.5 − filteramount) * 2.0
In SaturationFilter you will need to use factor instead of amount when finding the delta for a given color component. Spend a minute reasoning through what impact this should have on varying component values.
deltacomponent = (targetcomponent − inputcomponent) * factor
4. Stacking / Composing Filters
In the main function, you will notice only one Filter will ever process an image, even if you add multiple filters to your request from the frontend. Your task in this section is to replace the if statement and TODO in main with a loop that will apply the process method of all filters in the request object to the image. Once you’ve successfully done this, you will be able to add multiple filters on top of one another, processed sequentially.
Challenge Edition - Invent Your Own Filters
These ideas are 100% optional if you are looking for more fun programming challenges.
Looking for a challenge beyond the 3 required filters? Here are some ideas!
Colorize
Contrast (this one is like saturation, but simpler: the target is red 127, green 127, blue 127)
Random Noise
Box Blur
Gaussian Blur
Linear Gradient
Sharpen
Edge Detection
Pride Stripes
Swirl
Make a Backup Checkpoint “Commit”
As you make progress on this exercise, making backups is encouraged.
- Open the Source Control panel (Command Palette: “Show SCM” or click the icon with three circles and lines on the activity panel).
- Notice the files listed under Changes. These are files you’ve made modifications to since your last backup.
- Move your mouse’s cursor over the word Changes and notice the + symbol that appears. Click that plus symbol to add all changes to the next backup. You will now see the files listed under “Staged Changes”.
- If you do not want to backup all changed files, you can select them individually. For this course you’re encouraged to back everything up.
- In the Message box, give a brief description of what you’ve changed and are backing up. This will help you find a specific backup (called a “commit”) if needed. In this case a message such as, “Progress on Exercise” will suffice.
- Press the Check icon to make a Commit (a version) of your work.
- Finally, press the Ellipses icon (…), look for “Pull/Push” submenu, and select “Push to…”, and in the dropdown select your backup repository.